How to Create Express Entry Profile for Canada PR?
Create Canada PR Express Entry profile easily on CIC website. Email confirmation in 24 hours with CRS score. Profile added to candidate pool. English test result, WES assessment required.
In the ecosystem of Canadian immigration, all roads lead to Express Entry system. This is an online application management system that helps Canada immigration department (called IRCC) manage applications.
To get started with your economic immigration program such as Federal Skilled Worker (FSW) or Federal Skilled Trade (FST) or Canadian Experience Class (CEC), the first step is to create an Express Entry profile.
Documents Required For Express Entry Profile
How to Create Express Entry Profile?
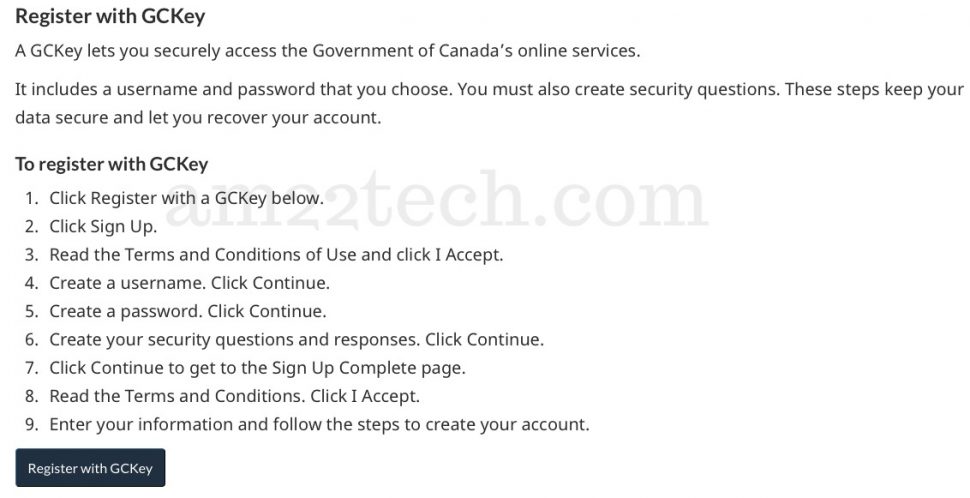
#1 Visit the CIC website to create a secure IRCC account.
Select the GCKey option, that let’s you create a unique username and password for your account.
If you are already in Canada and have an existing login with any of the sign-in partners, then you can use those credentials instead.
If you have applied for Canadian visitor visa earlier, you can use the same username and password here.
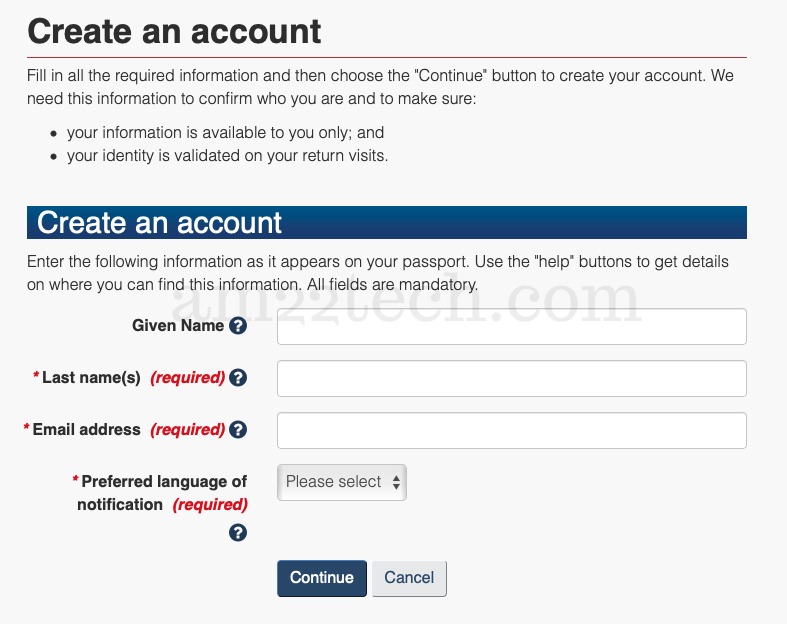
#2 Once you have created your account, and setup additional security questions, you’ll land on your account home page.
Think of this as your Mail Inbox.
Throughout your PR journey, any updates on your application or communication from IRCC will immediately reflect here.
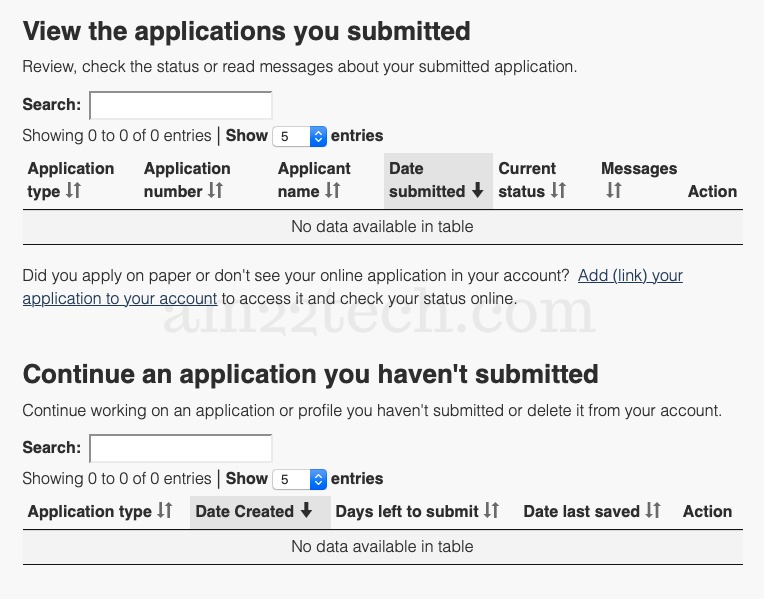
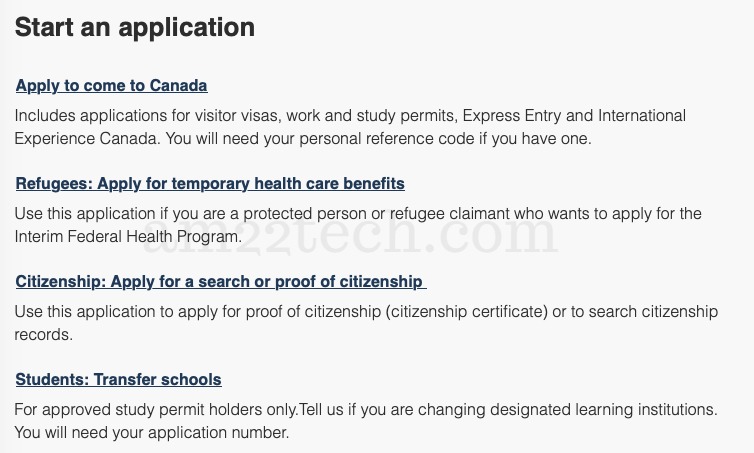
#3 Scroll down on the page until you see the options to start a new application. Select “Apply to come to Canada”.
If you used the “Come to Canada” tool, then you would have received a Personal Reference Code, which simply carries over your already keyed in information into this application.
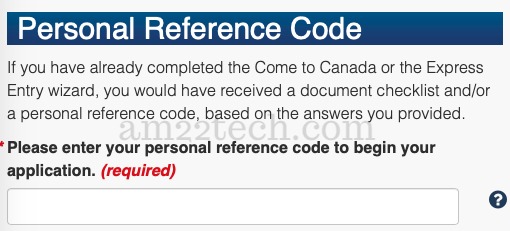
If you haven’t then you can scroll down and select Express Entry to check your eligibility to proceed.
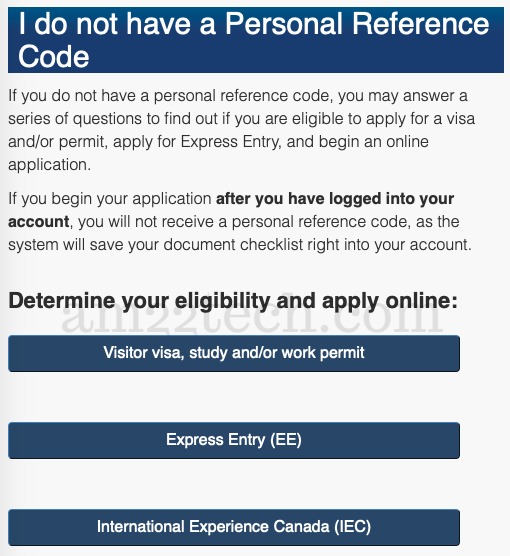
#3A Click “Express Entry” and start your evaluation. You’ll be asked these questions for the Canada PR eligibility:
- Which province/territory do you plan to live in?
Choose the province you are most interested in. It will not affect any immigration decision on your application. - Which language test did you take for your first official language?
IELTS, unless you took a French test. - What date did you take the test?
To check if the test results are older than 2 years. - Enter test scores for Speaking, Listening, Reading, and Writing
To check if you scored CLB 7 or above. Less than CLB 7 is not eligible. - Do you have other language results?
None. Unless you took another test. - In the last three years, how many years of full-time skilled work experience do you have in Canada? Which NOC level did you have the most experience in?
If you have never worked in Canada before, select None. NOC is used to check if your occupation comes under Skill category 0, A or B – Managers, Professional, Technicians, respectively. - In the last 10 years, how many years of full-time skilled work exp. do you have? Do you have at least two years of experience in any of the listed skilled trades?
This is where you mention your work ex. from back home. If you have not worked in any skilled trade, select None. - How much money will you bring to Canada and how many family members do you have?
Select the CAD amount and mention your spouse and children, even if they don’t come with you. If no one is accompanying you then select ‘1’. - Do you have a valid job offer in Canada?
Yes/No - What is your Date of Birth? What is the highest level of education for which you have earned a Canadian degree, diploma or certificate, or had an ECA done.
Mention your DoB, and the result of your WES evaluation. - Check all that apply
- Studied fill time in Canada for 2 years or more
- Have at least 2 years of full-time work exp. in Canada
- Have a relative in Canada who is a citizen/PR of Canada, and is your parent, child, grandparent, grandchild, sibling, aunt, uncle, niece or nephew.
- None of the above
- What is your marital status?
- Does your spouse plan to come with you to Canada?
- Is your spouse a citizen or permanent resident of Canada?
- Has your spouse studied full-time for 2 years in Canada?
- Has your spouse worked in Canada full-time for one year or more?
- Has your spouse taken a language test? Yes/No. Based on your response, you will be asked to provide their scores.
Once you are done answering the eligibility test, the tool will display your results such as this:
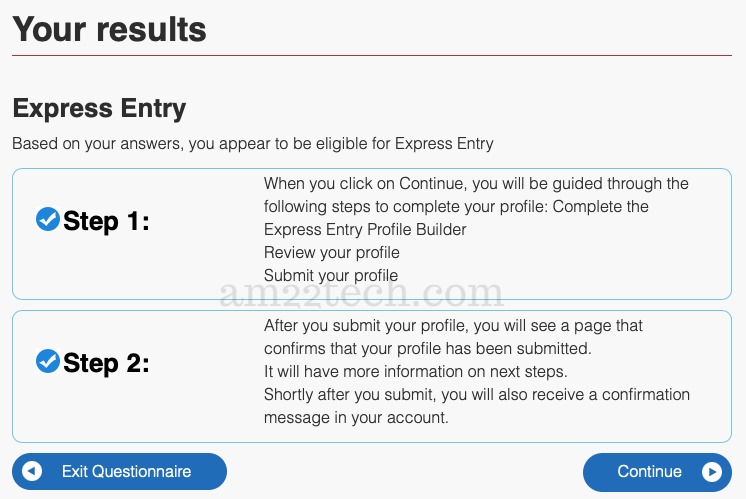
#4 Great news! The system thinks you are good to start building your Express Entry profile. Hit continue to get started.
#5 The Express Entry profile will seek the following information:
- First, Last name, Gender, DoB exactly as in passport.
- Marital status, and if married, whether your spouse will accompany you to Canada.
- Given name, family name, gender and date of birth of spouse
Based on the information you have provided, the system will prepare a customized list of forms that need to be filled in by you and your spouse.
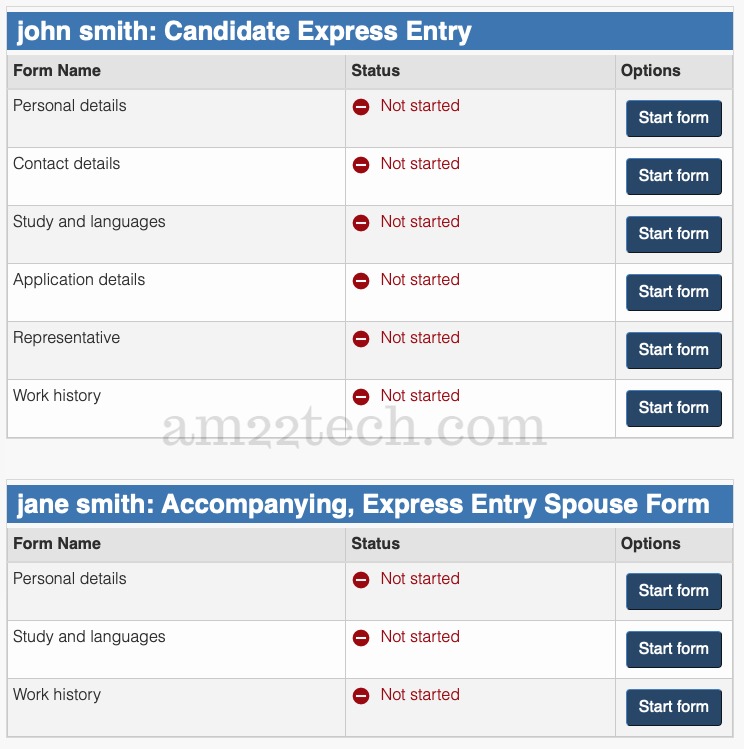
#6 Start filling up the forms diligently, keeping all information accurate.
Regularly save the application in case of any accident that might log you out and have you repeat the entire data entry process. There is no pressure to do this instantly. So, you can take your time.
As you fill the form and proceed to the next section, a green tick mark will appear on the top right corner of the sub-form. If that is red, then you will not be able to proceed to the next sub-form.

Once you complete the form, the application will automatically exit to the index, and indicate that you have completed the first form, all the while giving you an opportunity to update the form if required.

- Personal Details Form: Name, gender, DoB, country and city of birth, marital status, passport/national identity details, have you applied to IRCC before, citizenship, country of residence, number of family members, how much money will you bring to support you and your family, and lastly, any relatives you have in Canada and their details. Note that the funds you bring should exceed the recommended amount set by IRCC.
- Contact Details: Language of correspondence (the language you want to receive communications in), and email address
- Study and Languages: This includes your field of study, period of study, number of academic years completed, full-time/part-time study, whether certificate/degree awarded, country and city of study, name of institution, level of education, if this wasn’t a Canadian education then what was it deemed equivalent to on an ECA. Include details of your ECA – date issued, ECA certificate number, save and add for each degree earned. Details of language test taken, scores, test result form or certificate number.
- Application Details: Which province or territory would you consider living in. You can select all or particular ones if you like. Have you received nomination from any province? If yes, provide details, if no, then save and continue.
- Representative: If you want to appoint someone else to interact with IRCC on your behalf then you can do so. If not, just select no.
- Work History: Enter the NOC code for which you will be claiming work experience. Do you have a certificate of qualification – answer only for people in skilled trades. Do you have a job offer in Canada? Enter details of work history – period of work, hours per week, NOC code, job title, employer name, country and city of work. Save and add for each job title you held. If you held three titles in the same company, then entire three rows.
- Spouse Details: Entire similar details for spouse. Remember that whatever you enter here, you’ll have to provide documentation for the same. If you enter education and work history, then you will be asked to provide an ECA and employer reference letter, later on in the process. If you do not wish to claim education, work experience, and language ability for your spouse then leave all those questions blank. DO NOT answer them.
This is what your Express Entry profile will look like once you have completed all the forms.
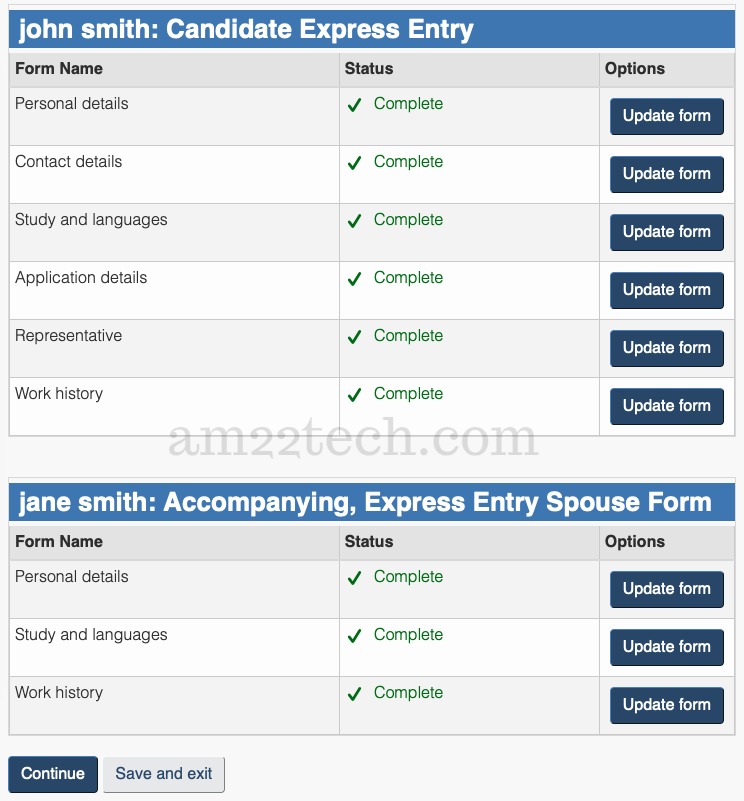
Click continue button and you’ll have to sign an electronic disclosure form to release your personal information to IRCC.
Type in your name and click on sign.
#7 Once you have signed the declaration, the screen will refresh and the ‘Sign’ button will change to ‘Transmit’, meaning that your information will be communicated to IRCC’s servers, and you will officially enter the pool.

Within 24 hours, you’ll receive a confirmation from IRCC that you have been accepted into the Express Entry pool, and your Express Entry inbox will show your CRS score.
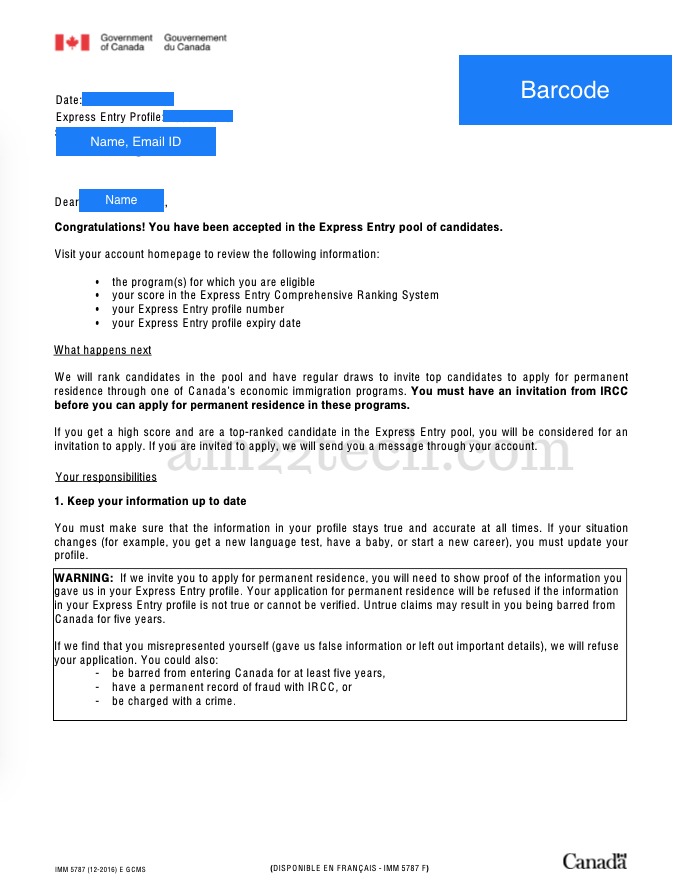
From here on, sit tight and wait for an Invitation to Apply, or a Provincial Nomination to come through. You can update the details of your Express Entry profile at any time and re-transmit the application.
Based on the updated information, the system will recalculate your score and update it.

